

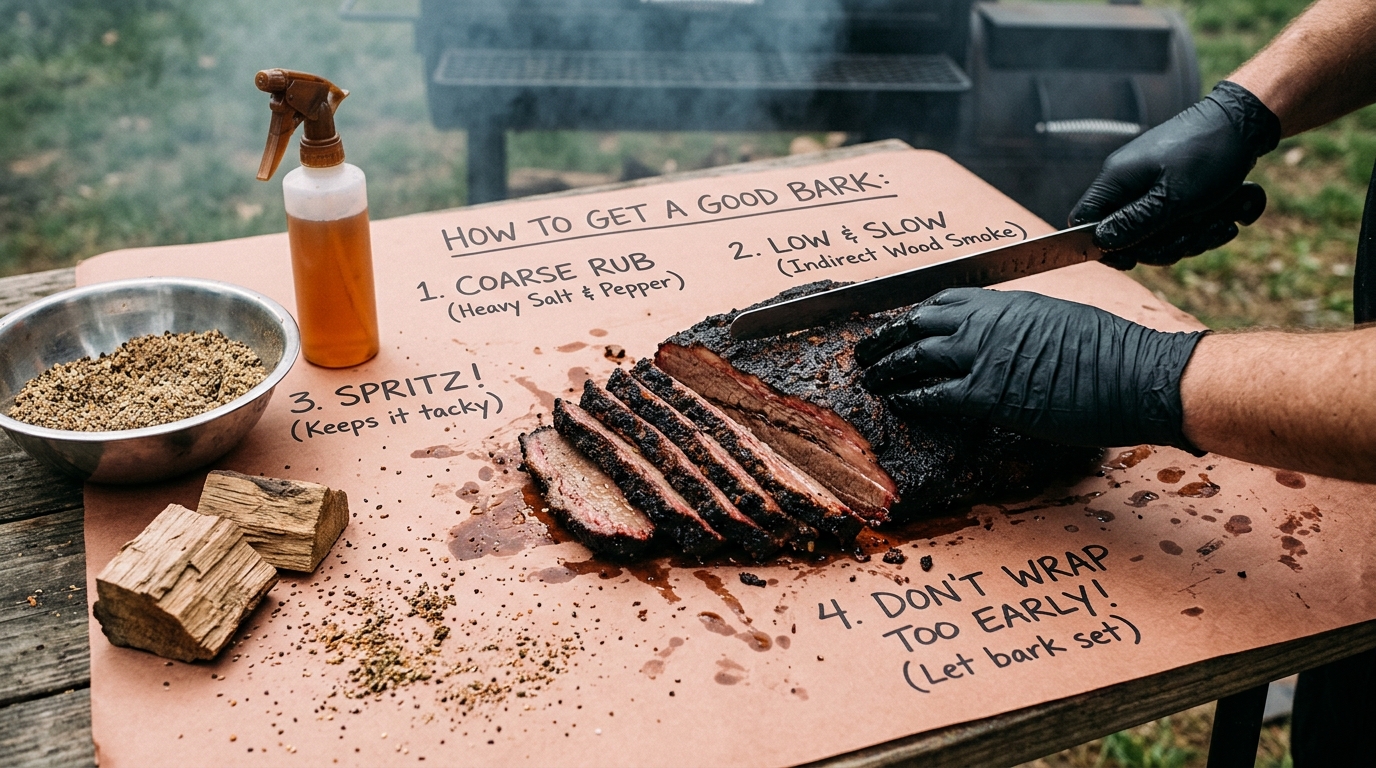
Achieving that perfect, mouthwatering bark on your smoked meat can take your barbecue game to the next level. The crisp and flavorful outer layer adds depth and complexity to every bite, making each morsel a tantalizing experience for your taste buds. In this post, we will explore expert tips and techniques to help you master the art of getting a good bark on your smoked meat, elevating your grilling skills to new heights.
Choosing the Right Wood
Choosing the right wood is crucial for achieving the desired flavor profile when smoking meat. Different types of wood impart distinct flavors to the meat, so it is essential to select the right wood that complements the type of meat being smoked. Common woods used for smoking include hickory, mesquite, apple, cherry, and oak. Hickory, known for its strong and smoky flavor, is popular for smoking pork and beef. Mesquite, with its intense and earthy flavor, pairs well with red meats like beef and lamb. Fruit woods like apple and cherry offer a milder, sweeter flavor that complements poultry and pork. Oak, with its versatile and moderate flavor, is suitable for almost any type of meat.
Consider experimenting with different wood types to find the perfect match for your preferences. It is also essential to ensure that the wood is well seasoned and free from any chemicals or additives that could taint the flavor of the meat. Using high-quality wood that is properly cured will enhance the overall smoking experience and result in deliciously smoked meat.
3. Preparing the Meat
Preparing the meat is a crucial step in achieving a delicious and tender result when smoking. Start by trimming any excess fat from the meat, as too much fat can lead to flare-ups and undesirable flavors. Next, season the meat generously with a dry rub or marinade of your choice. Make sure to massage the seasonings into the meat thoroughly to ensure even flavor distribution.
For larger cuts of meat, such as brisket or pork shoulder, consider injecting a flavorful liquid marinade to add moisture and enhance the taste. Allow the meat to rest at room temperature for about 30 minutes before placing it on the smoker. This will help the meat cook more evenly and retain its juices throughout the smoking process. By properly preparing the meat before smoking, you set the foundation for a mouthwatering end result that will leave your guests impressed.
Controlling Temperature
Controlling temperature is crucial when smoking meat to ensure it is cooked properly and safely. Maintaining a consistent temperature throughout the smoking process is key to achieving tender and flavorful results. The ideal smoking temperature typically ranges between 225°F and 250°F, depending on the type of meat being smoked.
Using a quality smoker with reliable temperature control features can help you regulate the heat effectively. Additionally, using a separate thermometer to monitor the internal temperature of the meat is essential to ensure it reaches the recommended safe cooking temperature. By carefully managing the temperature during the smoking process, you can achieve perfectly smoked meat that is both delicious and safe to eat.
5. Monitoring Smoke Levels
Monitoring smoke levels is crucial when smoking meat to ensure the desired flavor profile is achieved. Excessive smoke can result in a bitter taste, while too little smoke may not impart enough flavor. To monitor smoke levels effectively, it is recommended to use a combination of visual inspection and sensory evaluation.
Visual inspection involves observing the color and density of the smoke coming out of the smoker. Thin, blue smoke is ideal, indicating a clean burn with just the right amount of wood combustion. On the other hand, thick, white smoke signifies incomplete combustion and can lead to a creosote buildup on the meat, affecting the taste negatively. Additionally, sensory evaluation involves periodically checking the aroma of the smoke to ensure it remains pleasant and aromatic.
6. Wrapping the Meat
Wrapping the meat is a crucial step in the barbecue process that can significantly impact the final outcome. After the meat has cooked for several hours and reached a desirable level of tenderness, it’s time to wrap it to help retain moisture and enhance flavor. The most commonly used method for wrapping meat is the “Texas crutch,” where the meat is tightly wrapped in aluminum foil or butcher paper. This technique helps to accelerate the cooking process, tenderize the meat further, and prevent it from drying out.
When wrapping the meat, it’s essential to ensure a tight seal to trap the juices and create a steamy environment within the wrap. This steam will continue to break down the collagen in the meat, resulting in a more tender and flavorful end product. Additionally, wrapping the meat can help to prevent it from becoming overly smoky, as it limits the exposure to the smoke source. However, it’s important to monitor the internal temperature of the meat even after wrapping to avoid overcooking and maintain the desired level of doneness.
Resting and Serving
Resting: Resting the meat after cooking is a crucial step in ensuring a juicy and flavorful end result. Allow the meat to rest for a period of time, typically around 10-20 minutes, before carving or serving. This resting period allows the juices to redistribute throughout the meat, resulting in a more tender and moist final product.
Serving: When it comes to serving your perfectly cooked meat, presentation is key. Slice the meat against the grain for optimal tenderness, and arrange it on a platter or individual plates. Accompany the meat with your choice of sauces, sides, and garnishes to complement the flavors. Remember to serve the meat while it is still warm to fully enjoy the fruits of your labor and impress your guests with a delicious meal.