
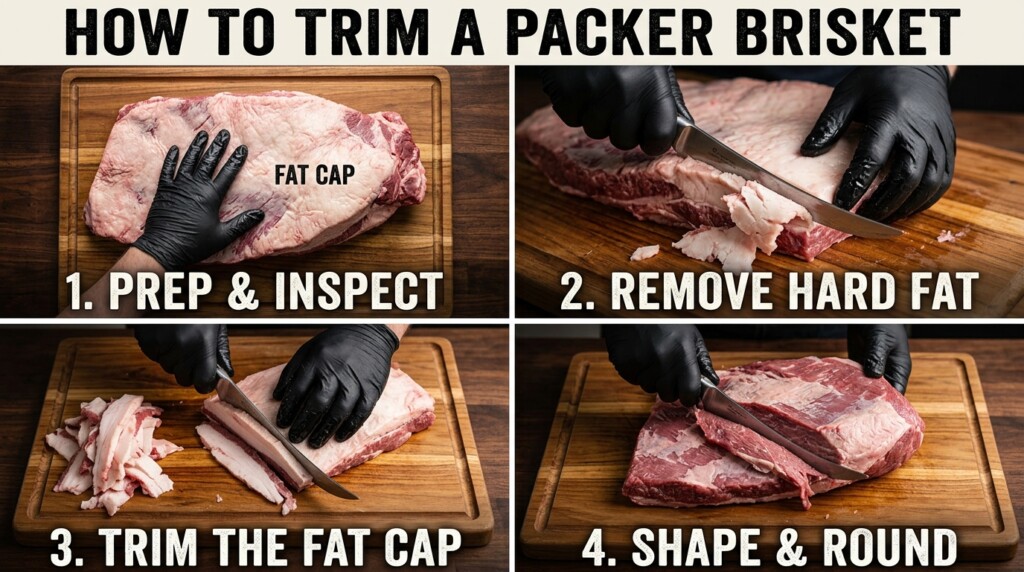
Discover the art of trimming a packer brisket like a pro with our step-by-step guide. From mastering the perfect fat cap to achieving optimal marbling, we’ll walk you through the process to ensure your brisket is not only beautifully trimmed but also primed for a mouthwatering, tender result. Dive into the world of brisket trimming and elevate your barbecue game to the next level.
Selecting the Brisket
Selecting the right brisket is crucial for a successful barbecue or smoked dish. When choosing a brisket, opt for a piece that has a good amount of marbling throughout the meat. Marbling helps keep the brisket moist and adds flavor during the cooking process. Look for a brisket with a thick fat cap on one side, as this will help protect the meat from drying out while cooking.
Consider the size of the brisket based on the number of people you plan to serve. A general rule of thumb is to estimate about 1/2 pound of brisket per person, as the meat will shrink during cooking. Additionally, ensure the brisket is fresh by checking the color and smell. A fresh brisket should have a bright red color and a clean, meaty smell.
3. Trimming Tools and Equipment
Trimming brisket requires the right tools and equipment to ensure precision and efficiency. One essential tool is a sharp boning knife, which allows for clean cuts through the meat and fat. A boning knife with a flexible blade is ideal for navigating around bones and trimming excess fat without removing too much meat.
Additionally, having a sturdy cutting board with a non-slip surface is crucial for stability and safety during the trimming process. A pair of kitchen shears can also be handy for trimming hard-to-reach areas or removing smaller pieces of fat. Finally, a digital kitchen scale can be useful for accurately portioning out the brisket and ensuring consistent trimming results.
4. Trimming the Fat Cap
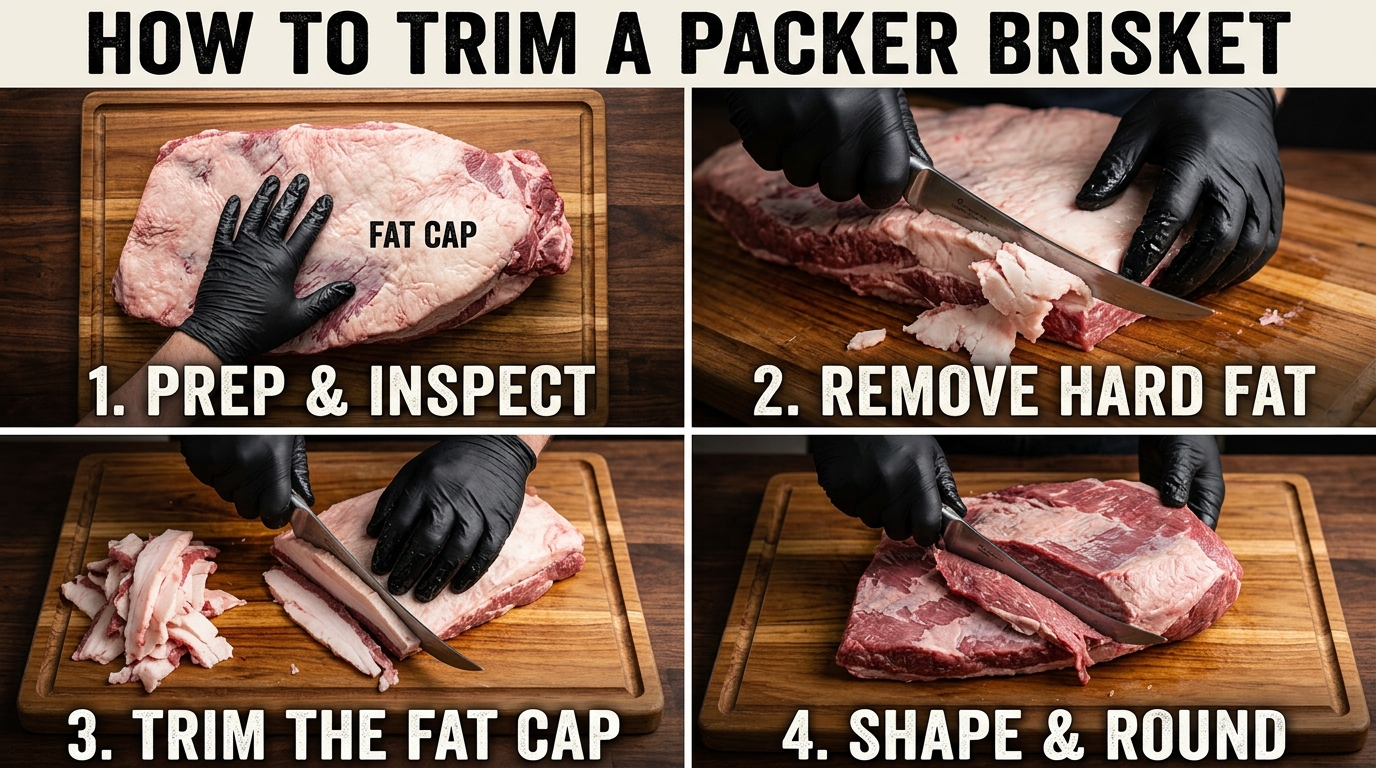
Trimming the fat cap is a crucial step in preparing a brisket for smoking or cooking. The fat cap, located on the top side of the brisket, can be quite thick and may not render down completely during cooking, resulting in a chewy and unappetizing texture. To trim the fat cap, use a sharp knife to carefully remove excess fat, leaving a thin layer to help keep the meat moist during cooking. It’s important to trim evenly across the brisket to ensure even cooking and flavor distribution.
Some pitmasters prefer to leave a thicker fat cap for added flavor and moisture, while others opt for a leaner brisket with minimal fat. The key is finding the right balance that suits your cooking preferences and desired end result. Properly trimming the fat cap not only enhances the taste and texture of the brisket but also allows the seasonings and smoke to penetrate the meat more effectively, resulting in a delicious and tender final product.
5. Removing the Silver Skin
Removing the silver skin from the brisket is an essential step in the trimming process to ensure a more enjoyable eating experience. The silver skin, also known as the membrane, is a tough and chewy layer that can hinder the absorption of flavors and seasonings into the meat. To remove the silver skin, start by gently loosening a corner of the membrane with a sharp knife or your fingers. Once you have a good grip, carefully pull the silver skin off the brisket in one smooth motion, taking care not to tear the meat underneath.
Removing the silver skin not only improves the texture of the brisket but also allows the rubs and spices to penetrate the meat more effectively during the cooking process. This step is crucial in achieving a tender and flavorful brisket that will be a hit at your next barbecue. Take your time and be patient when removing the silver skin to ensure the best results for your brisket.
Final Trimming and Shaping
Final Trimming: Once you have removed the excess fat cap and silver skin from the brisket, it’s time for the final trimming. This step involves tidying up any uneven edges or protruding pieces of fat to ensure a uniform shape and thickness throughout the brisket. Use a sharp knife to carefully trim off any remaining unwanted fat or meat, being mindful not to remove too much and compromise the juiciness of the final product.
Shaping the Brisket: Shaping the brisket is crucial for even cooking and presentation. To achieve a uniform shape, you can fold the thinner end of the brisket underneath to create a more even thickness. Additionally, you can use butcher’s twine to tie up any loose parts of the brisket to help it maintain its shape during the cooking process. Taking the time to properly shape the brisket will not only enhance its appearance but also contribute to a more consistent and delicious end result.
Conclusion
Brisket trimming is a crucial step in preparing a delicious and tender barbecue dish. By properly selecting the brisket, using the right tools and equipment for trimming, and skillfully removing the fat cap and silver skin, you can enhance the flavors and texture of the meat. Remember, the final trimming and shaping of the brisket not only improve its appearance but also ensure even cooking and a more enjoyable eating experience.
In conclusion, mastering the art of brisket trimming takes practice and patience, but the results are well worth the effort. Whether you are a seasoned pitmaster or a novice BBQ enthusiast, attention to detail in the trimming process can elevate your brisket to a whole new level of tenderness and flavor. So, roll up your sleeves, sharpen your knives, and get ready to trim your way to BBQ perfection!